5 Dimensional Inspection Reports Using 3D Scanning Technology for Digital Twin and Quality 4.0
Jump To Download Sample Inspection Reports
- Aerospace/Power Generation Airfoil
- Automotive Body-In-White
- Automotive Trunk Lid Stamping
- Consumer Goods/Medical Plastic Part and Tooling
- Heavy Machinery Shock Bracket Casting
Why Are Dimensional Inspection Reports Important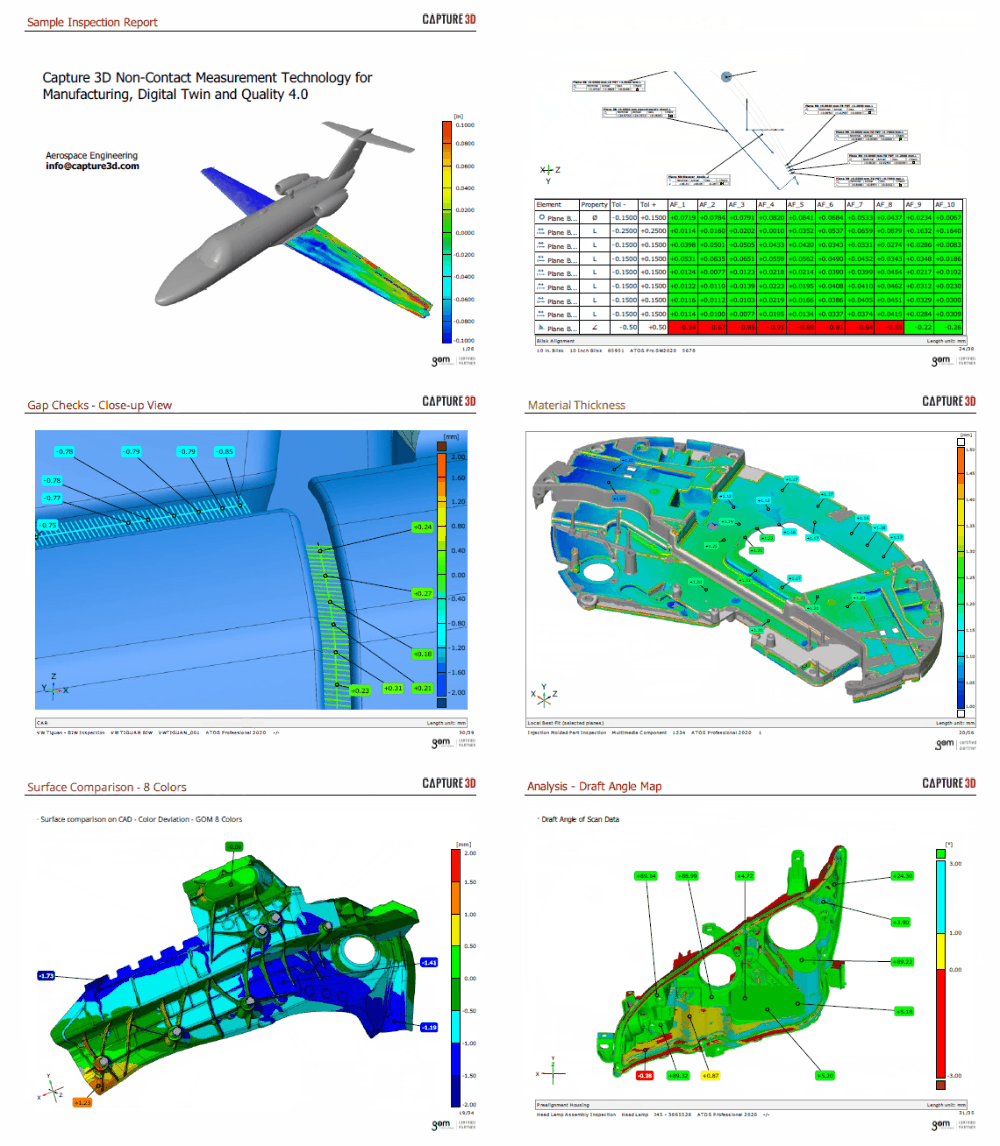
Have you ever run into issues with your quality engineering process? Are you spending too much time trying to figure out what the corrective action should be? Do you have numerous iterations or could benefit from reduced tuning loops? Could you save money by finding and solving problems before moving into production? Would you like to reduce costs and eliminate waste and redundant processes? These are the real struggles that face quality manufacturing professionals, and they are solving these challenges with the help of accurate 3D scanning and digital inspection technologies.
Producing the near-perfect part without any issues is the dream of today's manufacturers, driving quality managers and engineers to find new ways to improve old methods and processes. Throughout the ongoing quest for the near-perfect part, accurate 3D scanning technology continues to play a major role in helping manufacturers modernize their processes from product development to production. In this evolution, digital inspection reports were born to provide an insightful and comprehensive analysis to validate a part's intricate details and features, ensuring they are true to design. The information within these reports also reduces rework, costs, and time.
ATOS 3D scanners achieve high accuracy (single-digit microns for smaller measuring volumes) and obtain entire part geometry rather than the individual X-Y-Z points that traditional CMMs collect. ATOS 3D scanners hold the power to an accurate data-rich analysis to rely upon to help you make the right decisions that elevate your engineering processes. Below we've shared five free dimensional inspection reports to demonstrate how companies are using Capture 3D's GOM ATOS blue light 3D scanners and GOM software to achieve their quality initiatives.
What is a Dimensional Inspection Report?
Inspection is a critical step during the product life cycle, from product development to production. This process confirms that the product is within specifications and tolerance while also providing the insight needed to optimize the overall process. Manufacturers generate dimensional inspection reports to analyze crucial geometric elements to optimize design, manufacturing, and production processes. These reports compare 3D data collected during the measurement process to the nominal CAD data. The information is collectively compiled into an inspection report to display a detailed digital twin 3D visualization of the resulting measurement (actual) data of the part or tooling compared to the nominal. This 3D data visualization exposes deviations quickly, so manufacturers understand where the part or tooling is in or out of tolerance. Other important information such as sectional analysis, GD&T, trend/SPC analysis, surface defects, and CMM-type reports are also included. These inspection reports are fully customizable, with the option to utilize a template to generate reports automatically.
All data and reports have been created with Capture 3D's GOM technology.
Top 5 Complimentary Inspection Reports for Digital Twin and Quality 4.0
1. Aerospace/Power Generation: Turbine Engine Airfoil Inspection
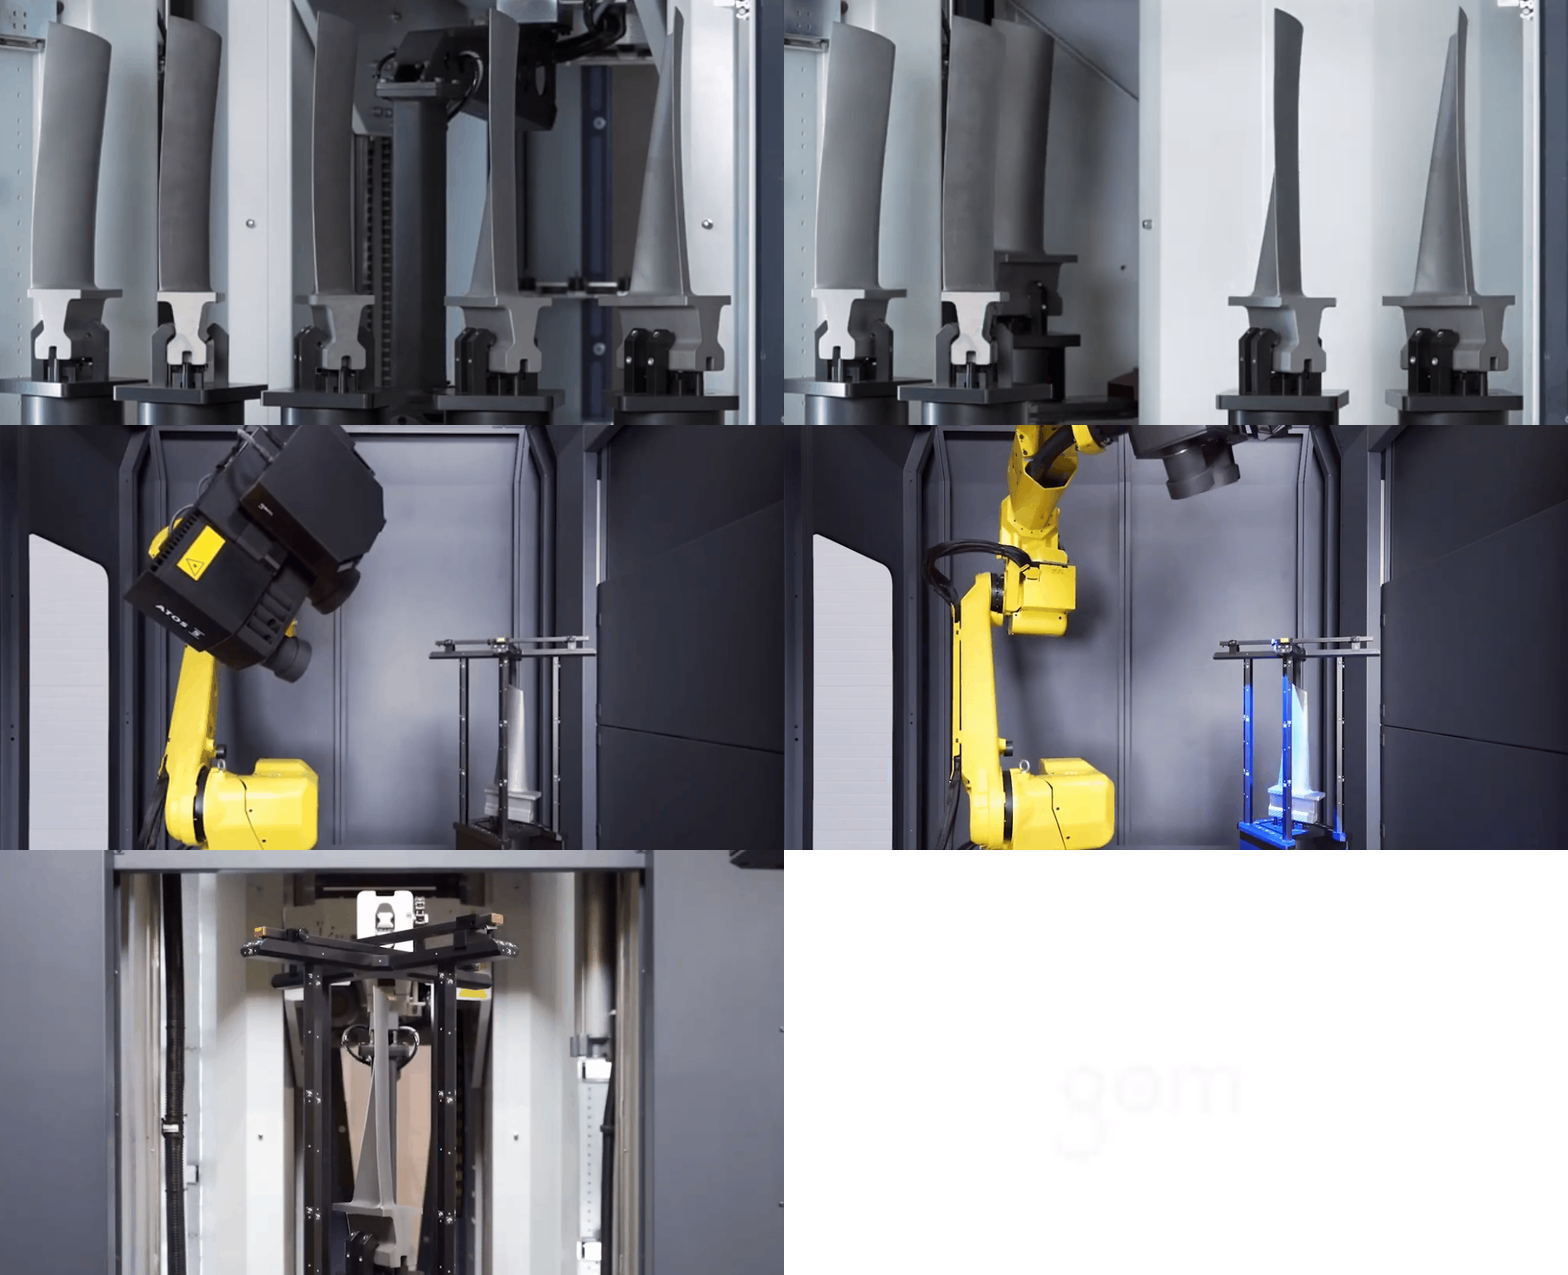
GOM Software's airfoil features provide advanced industry-focused inspection evaluations for turbine engine components, including turbine blades, blisks, stators, and other parts requiring high accuracy. ATOS 3D scanners complete measurement and inspection of these critical engine components rapidly, increasing throughput while retaining accuracy. With these expanded inspection capabilities, manufacturers quickly examine turbine engine components in-depth, enabling them to focus on safety, expand design capabilities, and do more with their data in a comprehensive and reliable analysis. This inspection report highlights the software's airfoil functionality, including inspection of profile mean line, profile centroid, and profile thickness of turbine blades based on 2D sections. The inspection report also highlights specific details such as leading and trailing edge, bow and sweep, and seven-point nest casting alignments. GOM software calculates the profile's center of gravity, radii, and twist and includes the results in the report to provide additional insights about the part's functionality.
The inspection report contains various surface comparisons to evaluate deviations, including casting, airfoil local best-fit, and root block local best-fit. Access to these surface comparisons unlocks the ability to perform valuable surface deformation analysis that help determine the cause of engine malfunctions and damage, such as a bird flying into an engine blade.
2. Automotive: Body in White (BIW) Metalforming and Digital Assembly
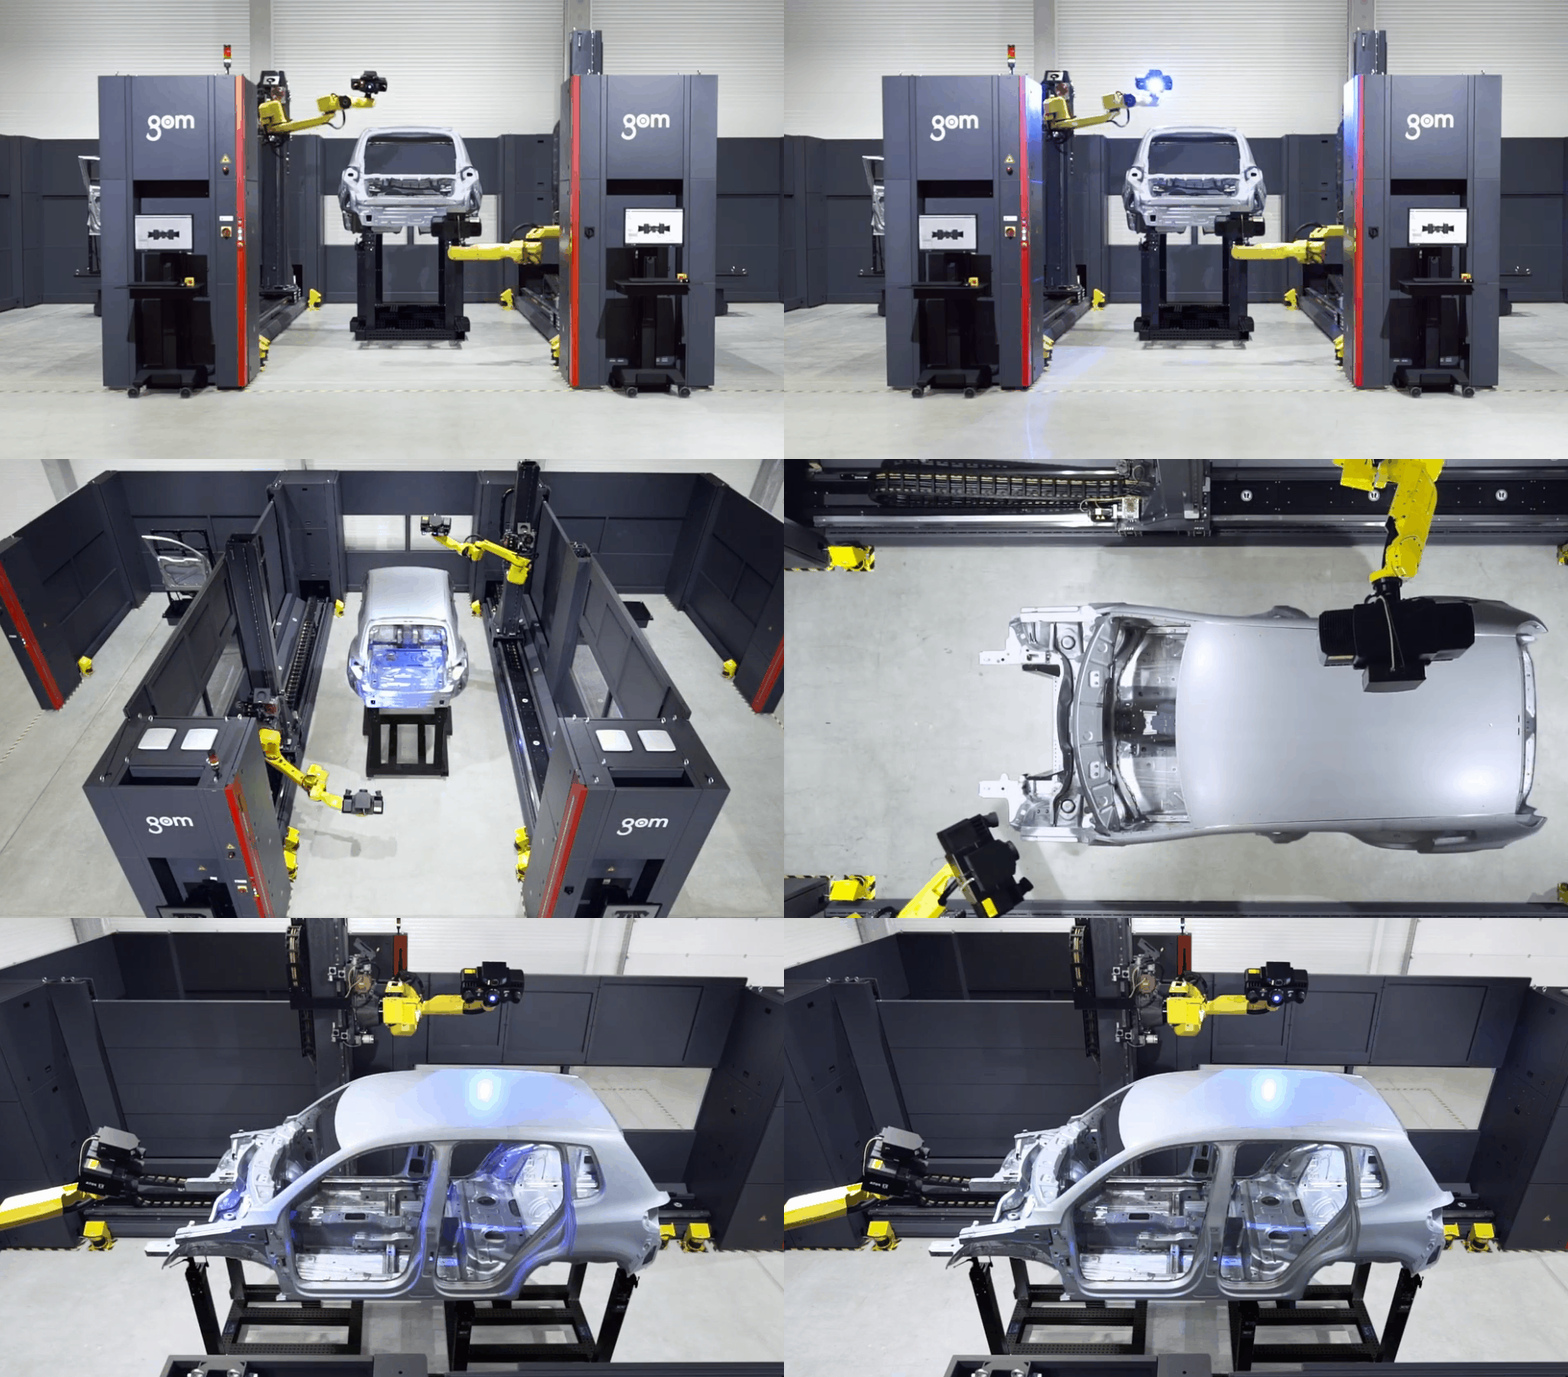
Body in White (BIW) is the metal skeleton of a car welded together where other stamped parts, such as the doors and trunk lid, will be hung. Executing BIW inspection is challenging because the welded frame contains numerous features, such as holes, slots, studs, and trim edges. The size of a BIW makes using a CMM for inspection challenging and time-consuming due to programming time. However, using an ATOS blue light 3D scanner for BIW inspection allows manufacturers to scan the entire body quickly, providing millions of accurate X-Y-Z data points.
With robotic ATOS technology, GOM's VMR (Virtual Measuring Room) software add-on module automatically programs the robot offline or online. The VMR also uses PMI/MBD CAD to create the inspection elements. Engineers simply import the CAD model, position it, and indicate the features that need to be measured. Then, by activating SmartTeach, the software optimizes the robot path automatically. The software also offers built-in GD&T functions, which save users valuable time during inspection.
Highlights of the inspection report include various surface comparisons, including pass/fail, surface comparison with door assembly. Surface comparison using digital assembly is also part of the report. Digital assembly is a feature used for form, fit and function of multiple components within the assembly. The report displays surface comparison with digital assembly to show how the parts will fit when assembled, using color to reveal space between areas like the doors, hood, and trunk hatch. In the report, color maps make it easy to check flush and gap throughout the entire BIW, with data labels that call out deviations. Inspection of the rubber seal gap between the car door and bodyside is efficient with a sealing gap analysis page that clearly displays continuous color deviation of rubber seal the rubber seal gap, indicating deviations with distinctive variations in color.
Another essential feature of this inspection report is Master Jig and Cubing. The report displays a virtual analysis that simulates the situations, reducing the need for expensive fixturing. Creating parts with nominal and actual data prompts GOM Inspect Professional software to automatically create the scenario and transfer it into a cubing situation by replacing the surrounding parts' actual meshes with the respective CAD.
3. Automotive: Trunk Lid Metalforming
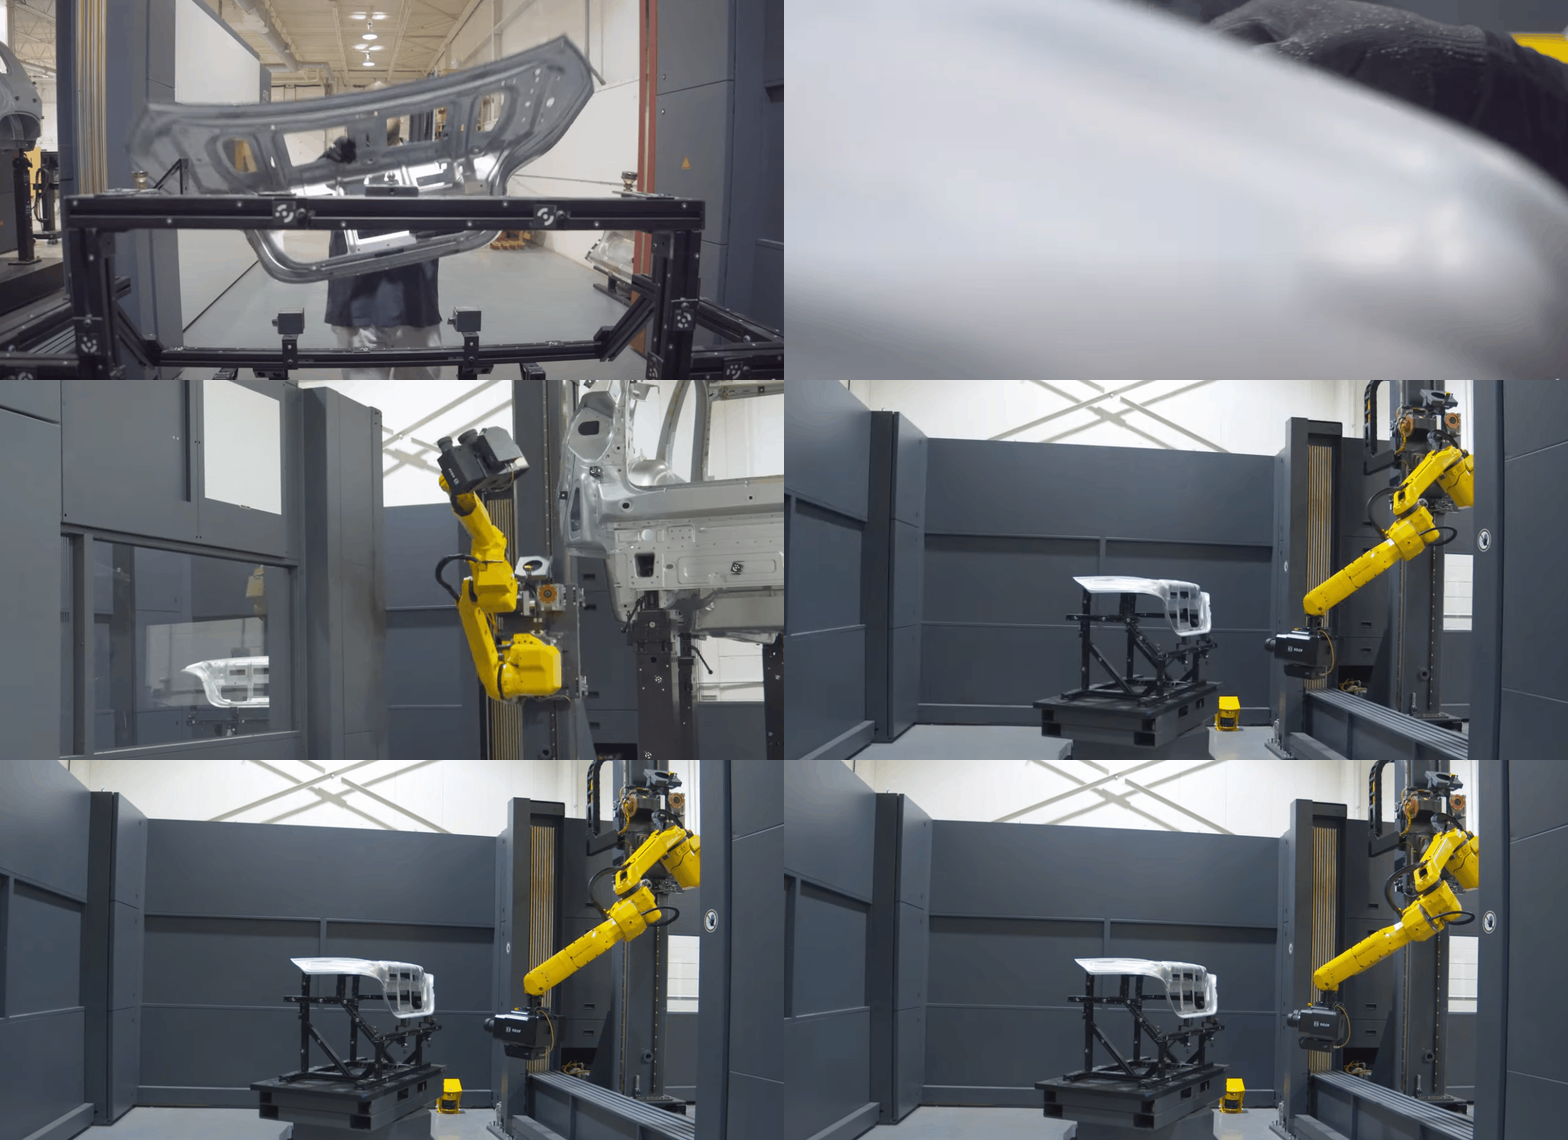
Like the BIW measurement analysis, GOM software offers many benefits for metal forming, and the inspection of "hang-on" pressed parts that fit together onto the BIW skeleton. In the die tool build process, 3D measurement data from the die gets compared to the CAD, then reference points get placed on the upper and lower halves of the die for form, fit, and function examination. This inspection includes discrete features and the overall condition of the piece, in addition to the analysis of the tooling that makes the part. Additionally, ATOS 3D scanners have a back-projection feature that projects deviation isolines and markings to show the die maker where to spot in areas during the build's tryout phase. The exact place to weld or grind is visible, clearly indicating how much to add or remove. Once the die is spotted, it can be scanned and benchmarked, so if the steel is broken or worn out, another piece can be cut to match the spotted piece. After the die is in production, scanning it over time allows technicians to monitor the tool's wear. Companies often archive the digitized die scan data to use as reference in the future.
GOM's software enables digital assembly of the individual stamped parts that make up an entire assembly, allowing for further analysis in a centralized area regardless of the physical part's location. This inspection report includes analysis of surface curve from edge, pass/fail surface comparison, surface point inspection, hole deviation analysis that visibly displays hole position showing the direction of deviation. The report also includes trim deviation analysis detailing continuous color deviation along edge curve and trim point inspection analysis, as well as slot deviation analysis.
With the ability to scan parts quickly and accurately for full-field inspection, combined with the power of reporting with visual deviation output on an easy-to-read color map, this technology is an essential tool in metal forming modernization.
4. Consumer Goods/Medical: Multimedia Injection Molded Part With Tooling
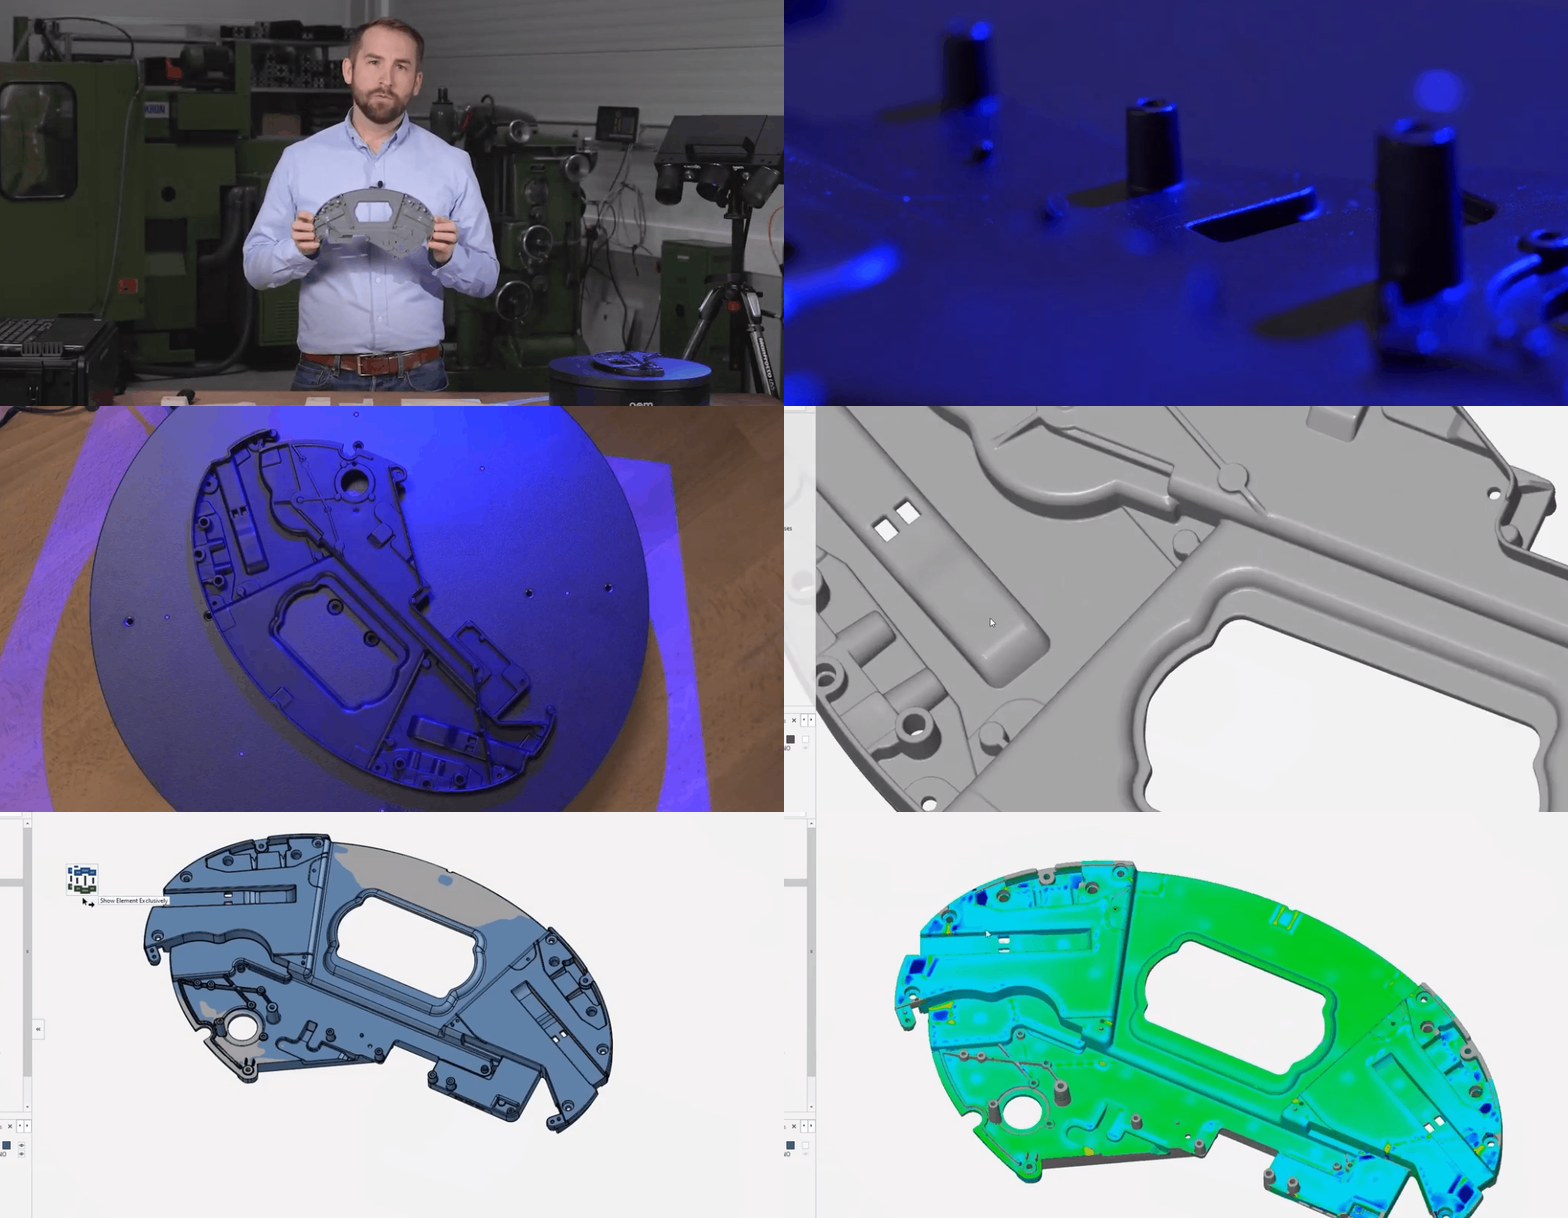
3D scanning and inspection are used throughout the plastic parts manufacturing process, from mold design to part qualification. Creating a part in the injection molding process begins when molten plastic is injected into a mold. Then, after the part cools, the mold opens, and the part is ejected. A draft is engineered into the part to help with the ejection process.3D scanning and inspection are used throughout the plastic parts manufacturing process, from mold design to part qualification. Creating a part in the injection molding process begins when molten plastic is injected into a mold. Then, after the part cools, the mold opens, and the part is ejected. A draft is engineered into the part to help with the ejection process.
This inspection report offers features that analyze the draft angle elements on the part, as well as functions specific to ejector pin marks, material thickness, shrinkage, warpage, and surface defect analysis. The 3D color maps provide a visual illustration of a part, tool, cavity, and assembly deviation for an in-depth analysis that makes the correct action clear, thus reducing the number of tuning loops and iterations.
5. Heavy Machinery: Shock Bracket Casting
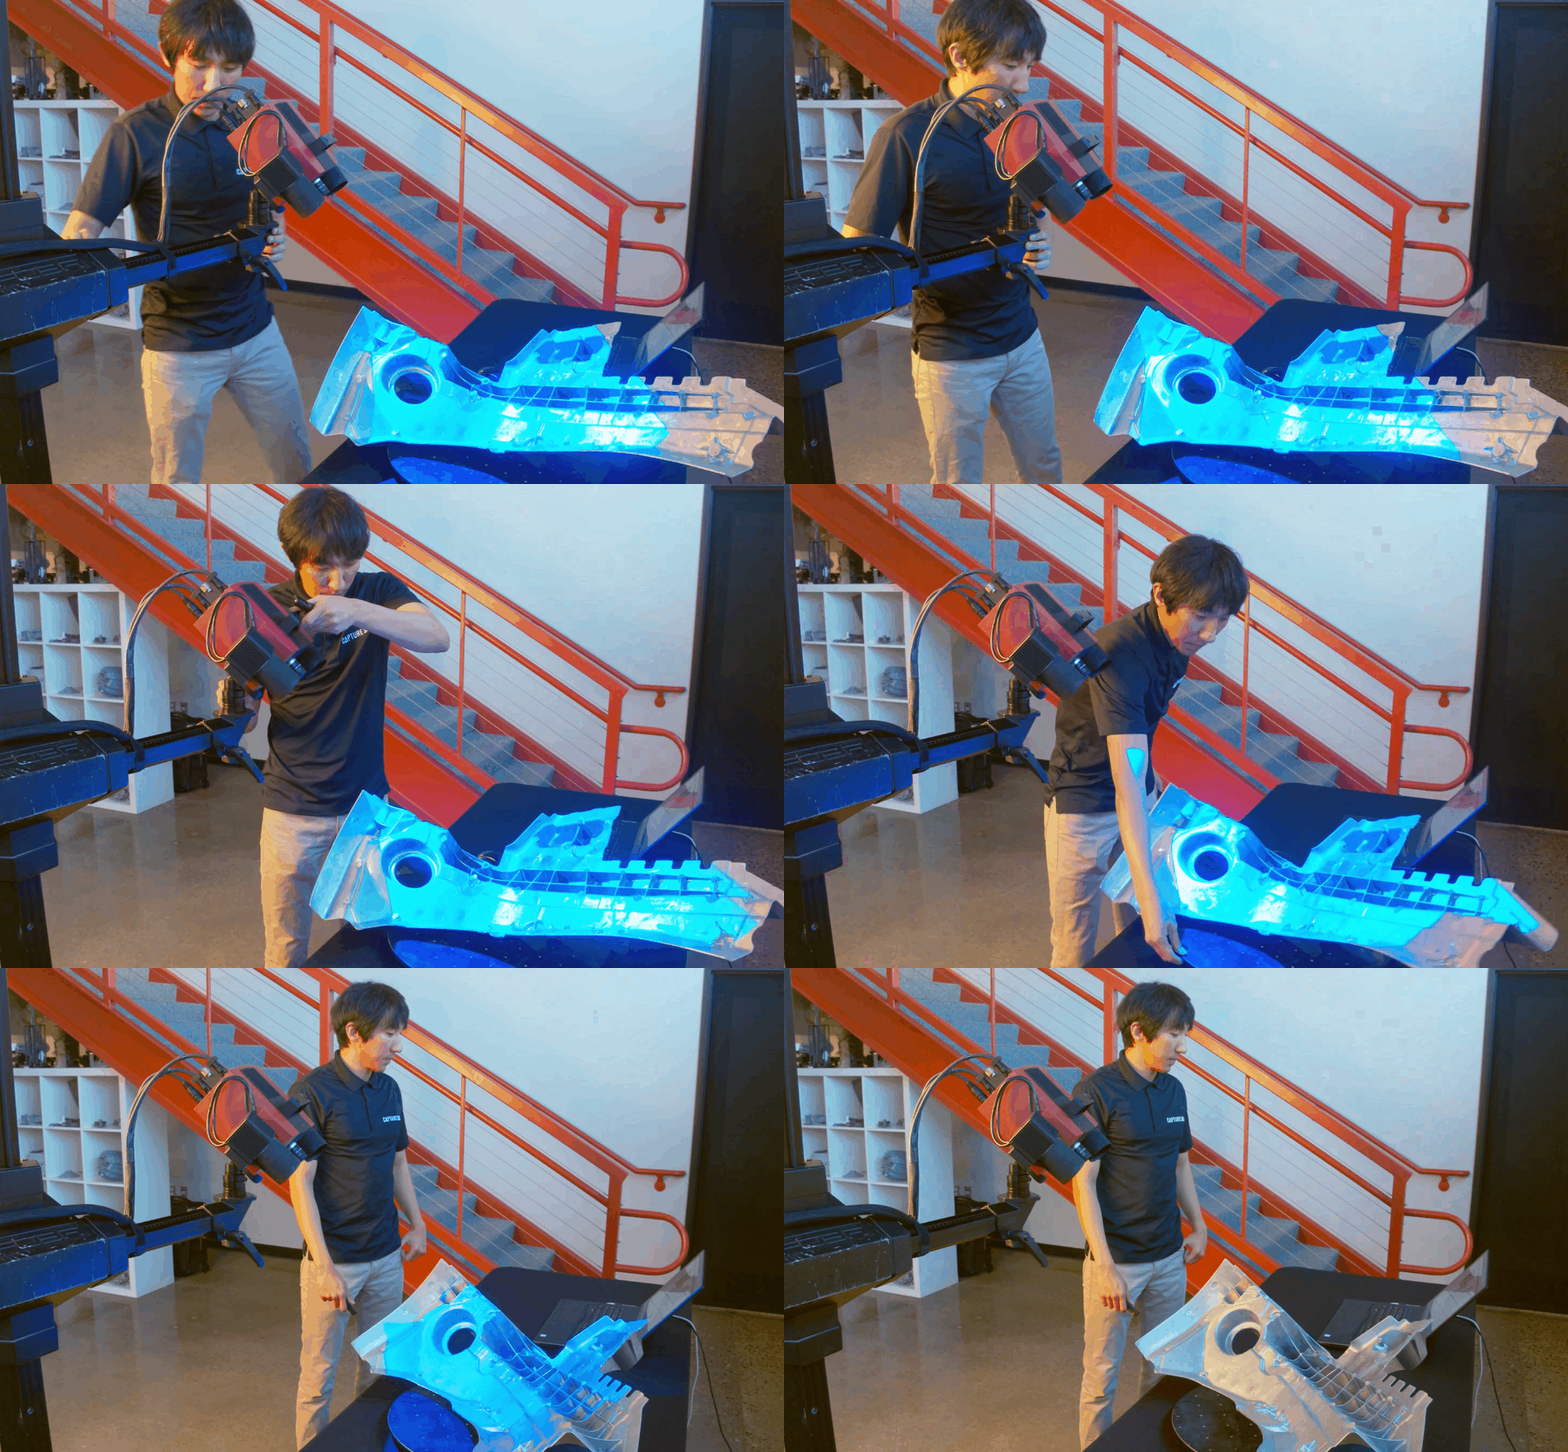
Near-net shape manufacturing in the casting industry is crucial because it refines the engineering process by reducing rework, eliminating excess material, and minimizing the costs. Similar to the injection molding process, GOM Software offers additional dimensional inspection features specific to the casting application for material wall thickness, GD&T, cavity inspection, digital assembly, magma flow simulation, and more. The inspection report includes a draft angle map that serves as an analysis of the draft angles. This page displays the full-field view of each point on the surface. The software computes the deviation between the surface normals and the demolding direction for each point. Calculating material thickness is automatic, with the results clearly labeled with colors representing the software's calculations for wall thickness for the whole part, rather than pointwise inspection.
These essential features ensure the correct manufacturing of casted parts, saving time and preventing hassle later in production.
Dimensional Inspection Reports for Quality 4.0
Dimensional inspection reports display critical engineering values using a combination of numbers and colors to help the reader interpret the data quickly, so anyone who needs to review the report understands the results. The report presents the information efficiently to enable adequate and collaborative analysis. Many departments rely on these inspection reports to check the quality of the product and processes. While anyone involved with the part benefits from reviewing the resulting information, the ability to replicate the inspection plan process is vital for managers and big businesses with large-scale projects that incorporate many different types of equipment in their measurement lab. Applications that enable the remote manufacture of parts for assembly like digital and virtual assembly rely on the consistency of software, information, and data like PMI, MBD, and CAD. In the fast-moving world of engineering, manufacturing a product requires the alignment of different departments, facilities, and suppliers to ensure its success.
How to Start Today!
Getting started with 3D scanning and digital inspection technologies is easy— simply contact a Capture 3D expert to discuss your specific application and schedule a demo to see the technology for yourself. By downloading the free GOM Inspect software, you can begin testing the software's features and interacting with sample data to understand what you can accomplish with these digital inspection tools. To unlock the full potential of GOM's inspection software solutions, upgrade to GOM Professional software. You'll experience capabilities that go beyond those of standard inspections to include advancements like full parametric features with templates, trend analysis, scripting, digital assembly, deformation analysis, and more. Don't forget to watch our GOM Inspect Software Training video to learn how to use the software and its intelligent features to their full potential and get started with intelligent inspections today.