Digital Photogrammetry
ZEISS digital 3D photogrammetry technology produces accurate coordinate measuring for fast dimensional inspection, verification, and deformation analysis. Instead of traditional contact measurements (i.e., probe), a non-contact optical 3D coordinate measuring system (CMS) can capture precise 3D coordinates in quick snapshots with a single high-end camera. By snapping photos from various angles with reference markers and utilizing the principles of triangulation, precise points are calculated onto the 3D coordinate plane.
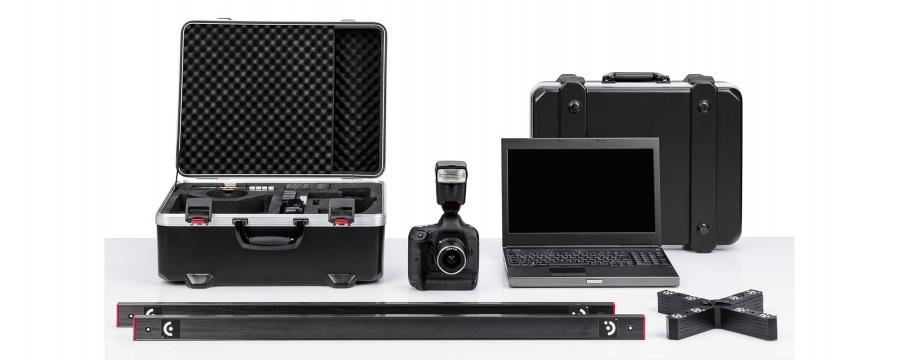
In order to carry out 3D photogrammetric measurements, the object needs to be recorded from various directions with a high-end digital camera. It is not necessary to maintain exact camera positions. Some coded measuring markers are applied to the fixture or directly to the object and are used for the automatic evaluation process. Scale bars are positioned next to the object. Their dimensions are transferred to the measurement to provide scale and to observe the measuring accuracy. Surface points to be measured have to be marked with removable markers or adapters. The thicknesses of these markers are precisely known within the system. Another method is to mark points or sections is with a pen. Each point or line drawn is accurately determined by image processing algorithms. The camera images are instantly transferred to the computer automatically using a high-speed wireless network or flash card reader. From there the computer completes dimensional analysis and evaluations are carried out.
TRITOP and ATOS Plus are widely utilized in various industries, and can measure different object sizes, surface finishes, and shape complexities:
-
- Complete non-contact 3D coordinate measuring machine with minimum hardware requirements
-
- Very high accuracy especially on large objects
-
- No wear and tear, no decrease of accuracy
-
- Easy setup and handling
-
- Independent of environmental conditions (climatic chamber, open air etc.)
